
This post contains affiliate links.
Cast Iron Skillet Chicken Breast is my go-to method for perfectly cooked chicken every time! Seared on the stovetop and then transferred to the oven to finish cooking through, it's crispy on the outside, tender and juicy on the inside! Slice it to eat as a main course, or use it in any recipe that calls for cooked chicken!
A lot of times, you just need cooked chicken to use in a recipe! Having cooked chicken in the fridge is so handy and a great meal prep for easy lunches.
There are a lot of ways to cook that chicken, but Cast Iron Chicken Breast is one of the best! Searing the chicken on the stovetop and then transferring it to the oven to finish cooking is a simple technique every home cook should master!
It's perfect for making Chicken Salad with Grapes and Apples and to use in Chicken Tortilla Soup!
Jump to:
Ingredients
This recipe is extremely basic, simply seasoning the chicken so its flavor can shine through. The cooking method is as important as the ingredients!

- Chicken Breast - I like to use a skin-on, bone-in chicken breast for the best flavor, but any chicken breast or thighs will work for this recipe. The skin and bone both add great flavor. You can use this recipe for just one chicken breast, or any amount that will fit in your skillet. You'll need to adjust the oven cooking time depending on the thickness of the chicken you're using. It's best to check for doneness with a thermometer. Chicken should be cooked to an internal temperature of 165° F.
- Olive Oil - The chicken is seared in olive oil as a basic cooking oil. You can use any type of oil you like, but you want to get your cast iron skillet hot to sear the chicken. Use something with a higher smoke point such as avocado, sunflower, or canola oil.
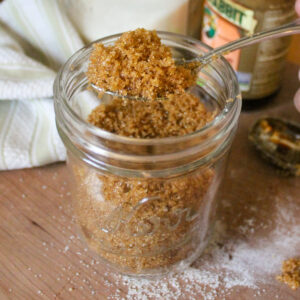
- Salt and Pepper - The chicken is seasoned in the simplest way with just salt and pepper. Be generous with the salt! This gives you a blank canvas, basic chicken that can be used for any recipe, or further seasoned to fit what you are making. For example, to make this chicken into tacos, add chili powder, garlic powder and cumin.
See recipe card below for full quantities.
Instructions
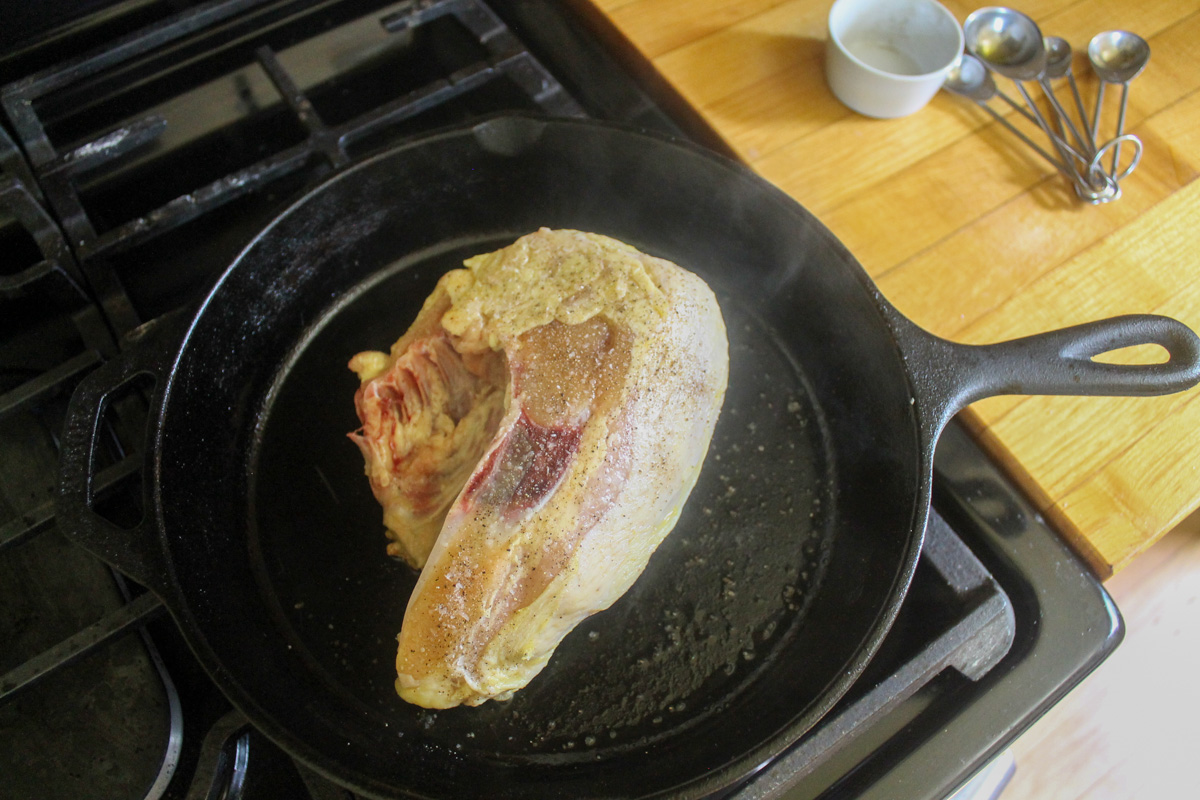
Step 1 - Preheat your oven to 400°. Preheat your cast iron skillet over medium high heat and add the olive oil.
It is important that your skillet is hot, but not smoking, before adding the chicken to get a good sear and a crispy exterior.
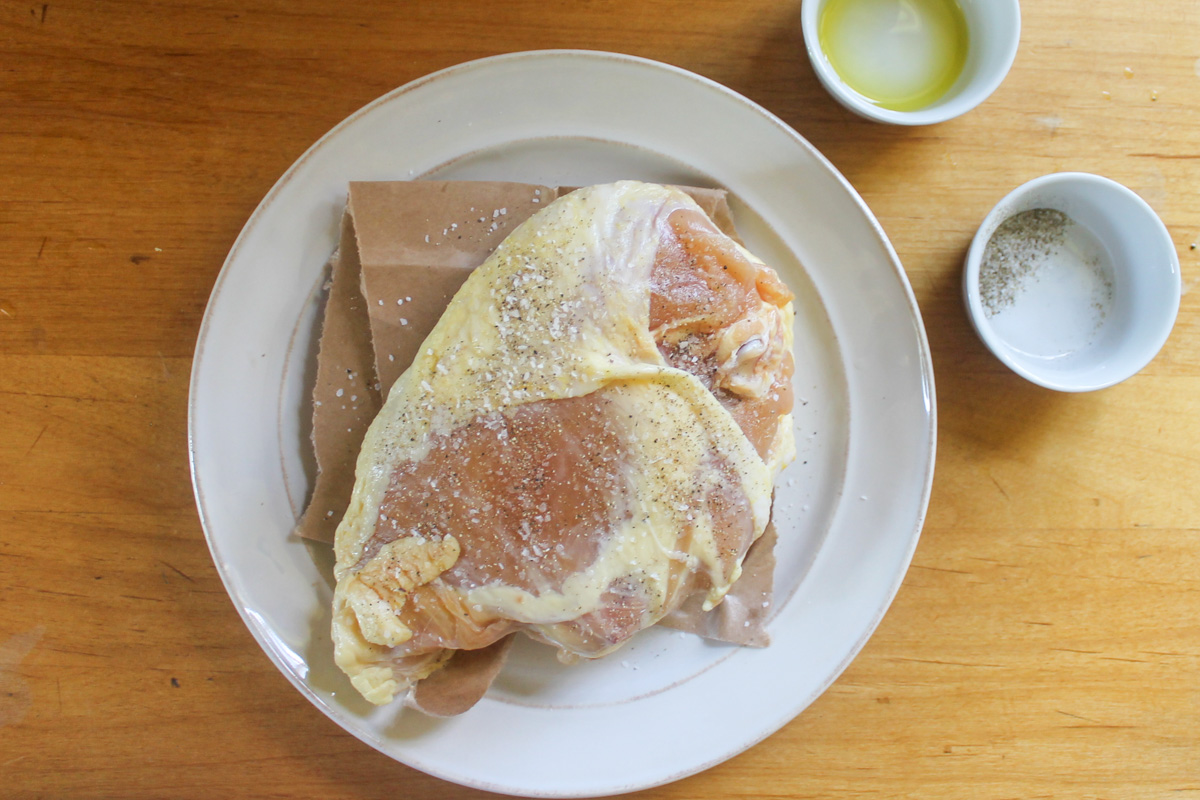
Season your chicken generously on all sides with the salt and pepper. I like to pre-measure the salt and pepper so your hands aren't touching raw chicken and then your pepper grinder and salt dish.
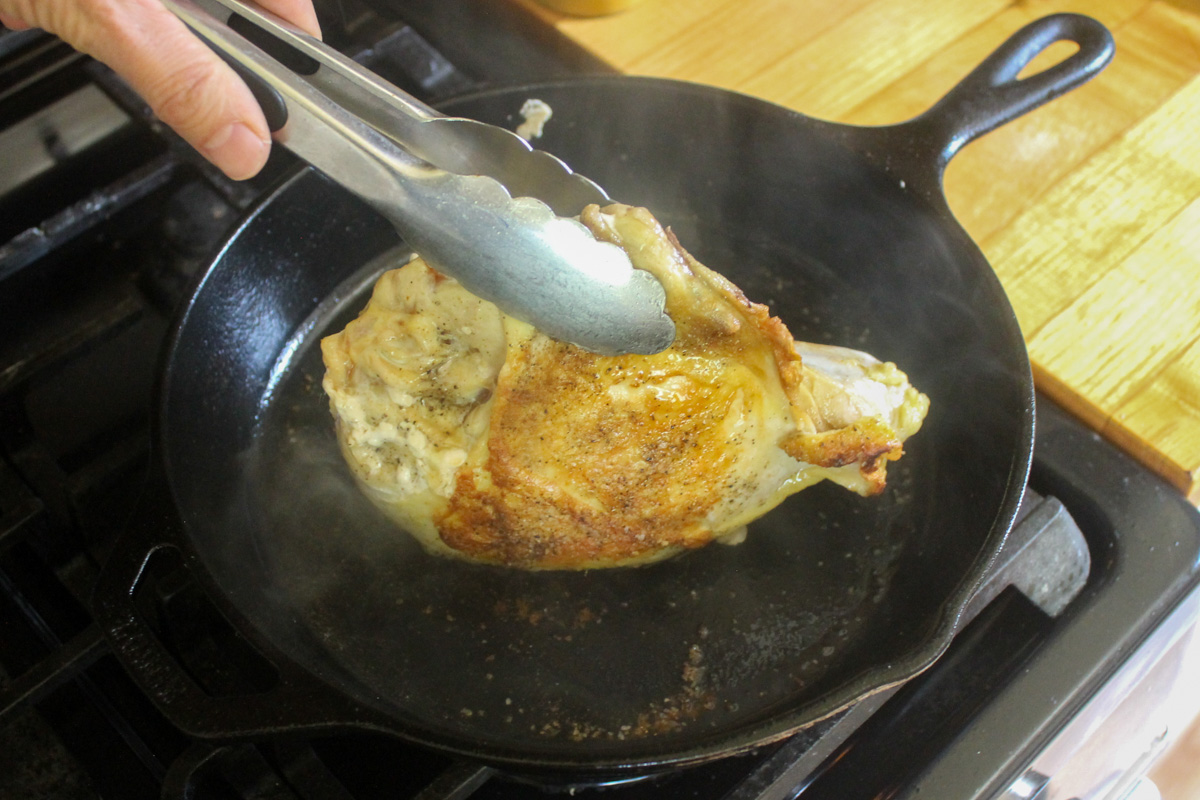
Step 2 - Add your chicken breast to the hot skillet skin side down. The first side you cook, the skin side, is considered your presentation side, and you want to get a good sear.
Cook about 4 to 5 minutes until golden brown. If your stove has a hood fan, turn it on!
Step 3 - Flip your chicken and cook the other side another 4 to 5 minutes. If the chicken is burning at any point, turn your heat down a bit.
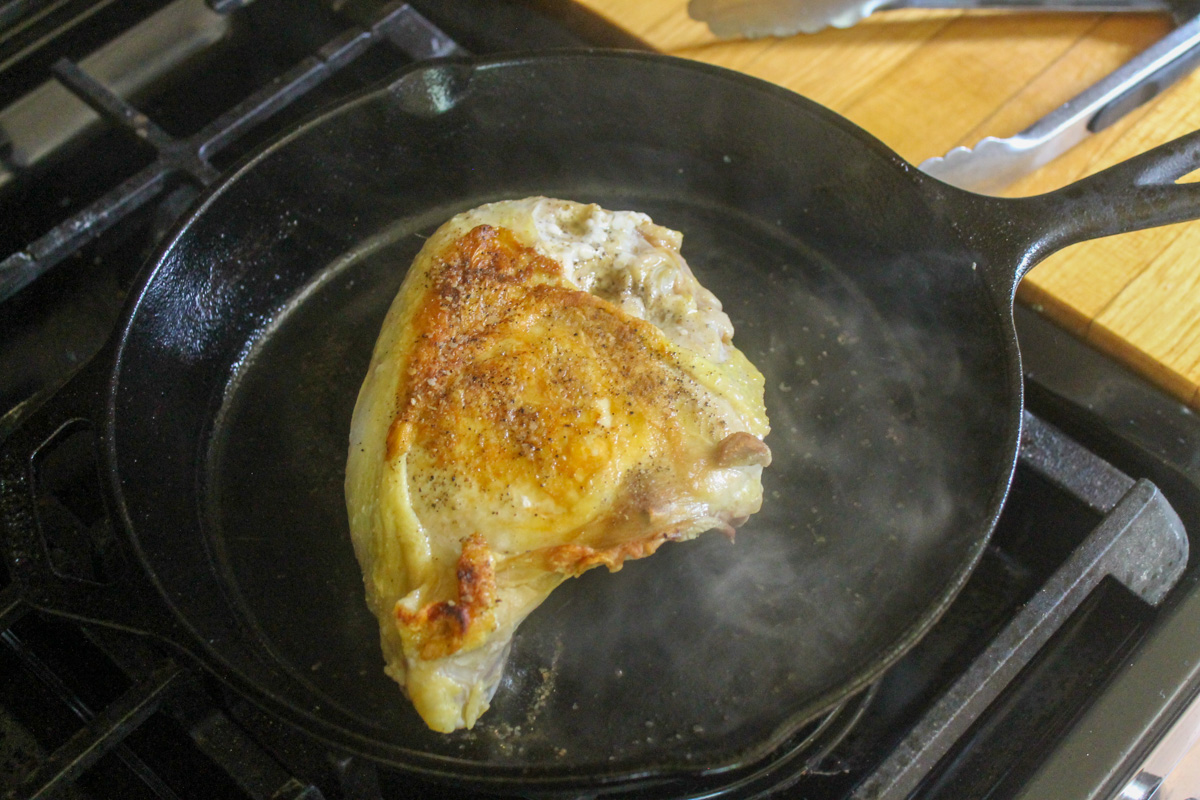
You can use tongs to tilt the chicken breast up to sear the side.
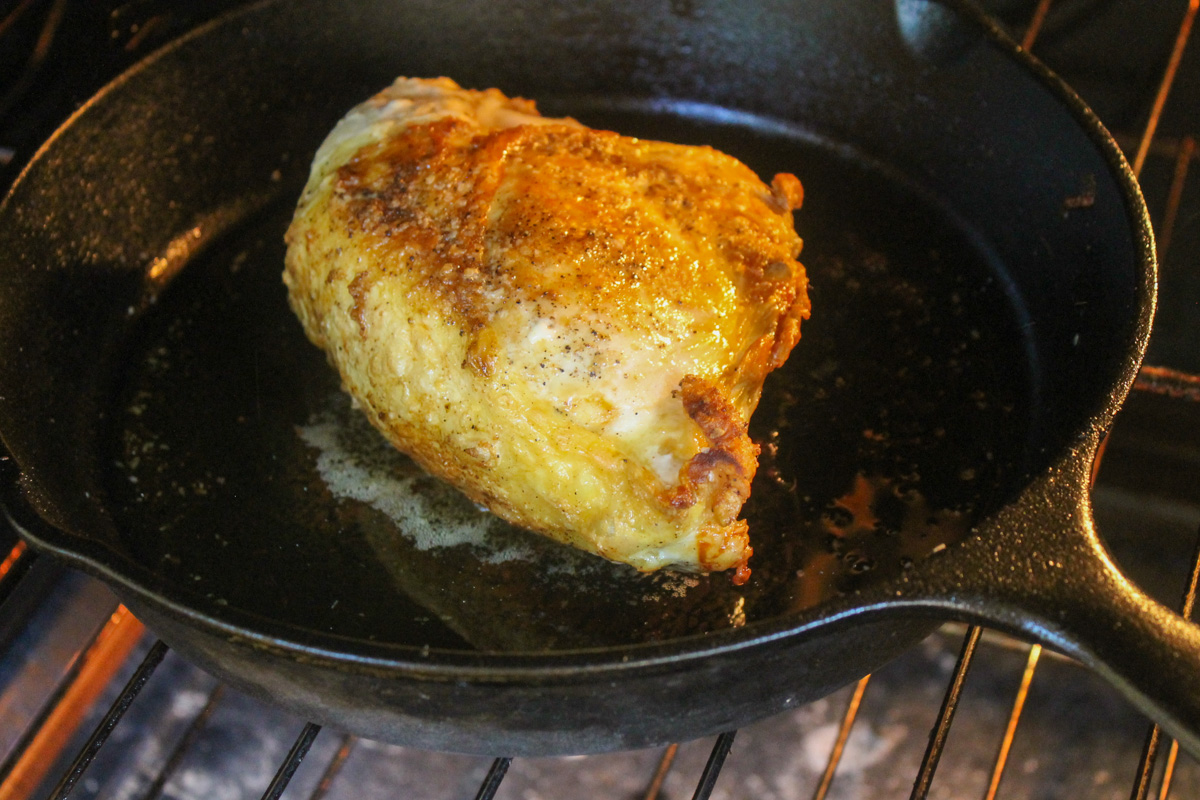
Step 4 - Transfer your cast iron skillet chicken breast to the oven to let it finish cooking through.
The time in the oven really depends on the thickness of your chicken breast and whether you are doing one breast or 2 or 3.
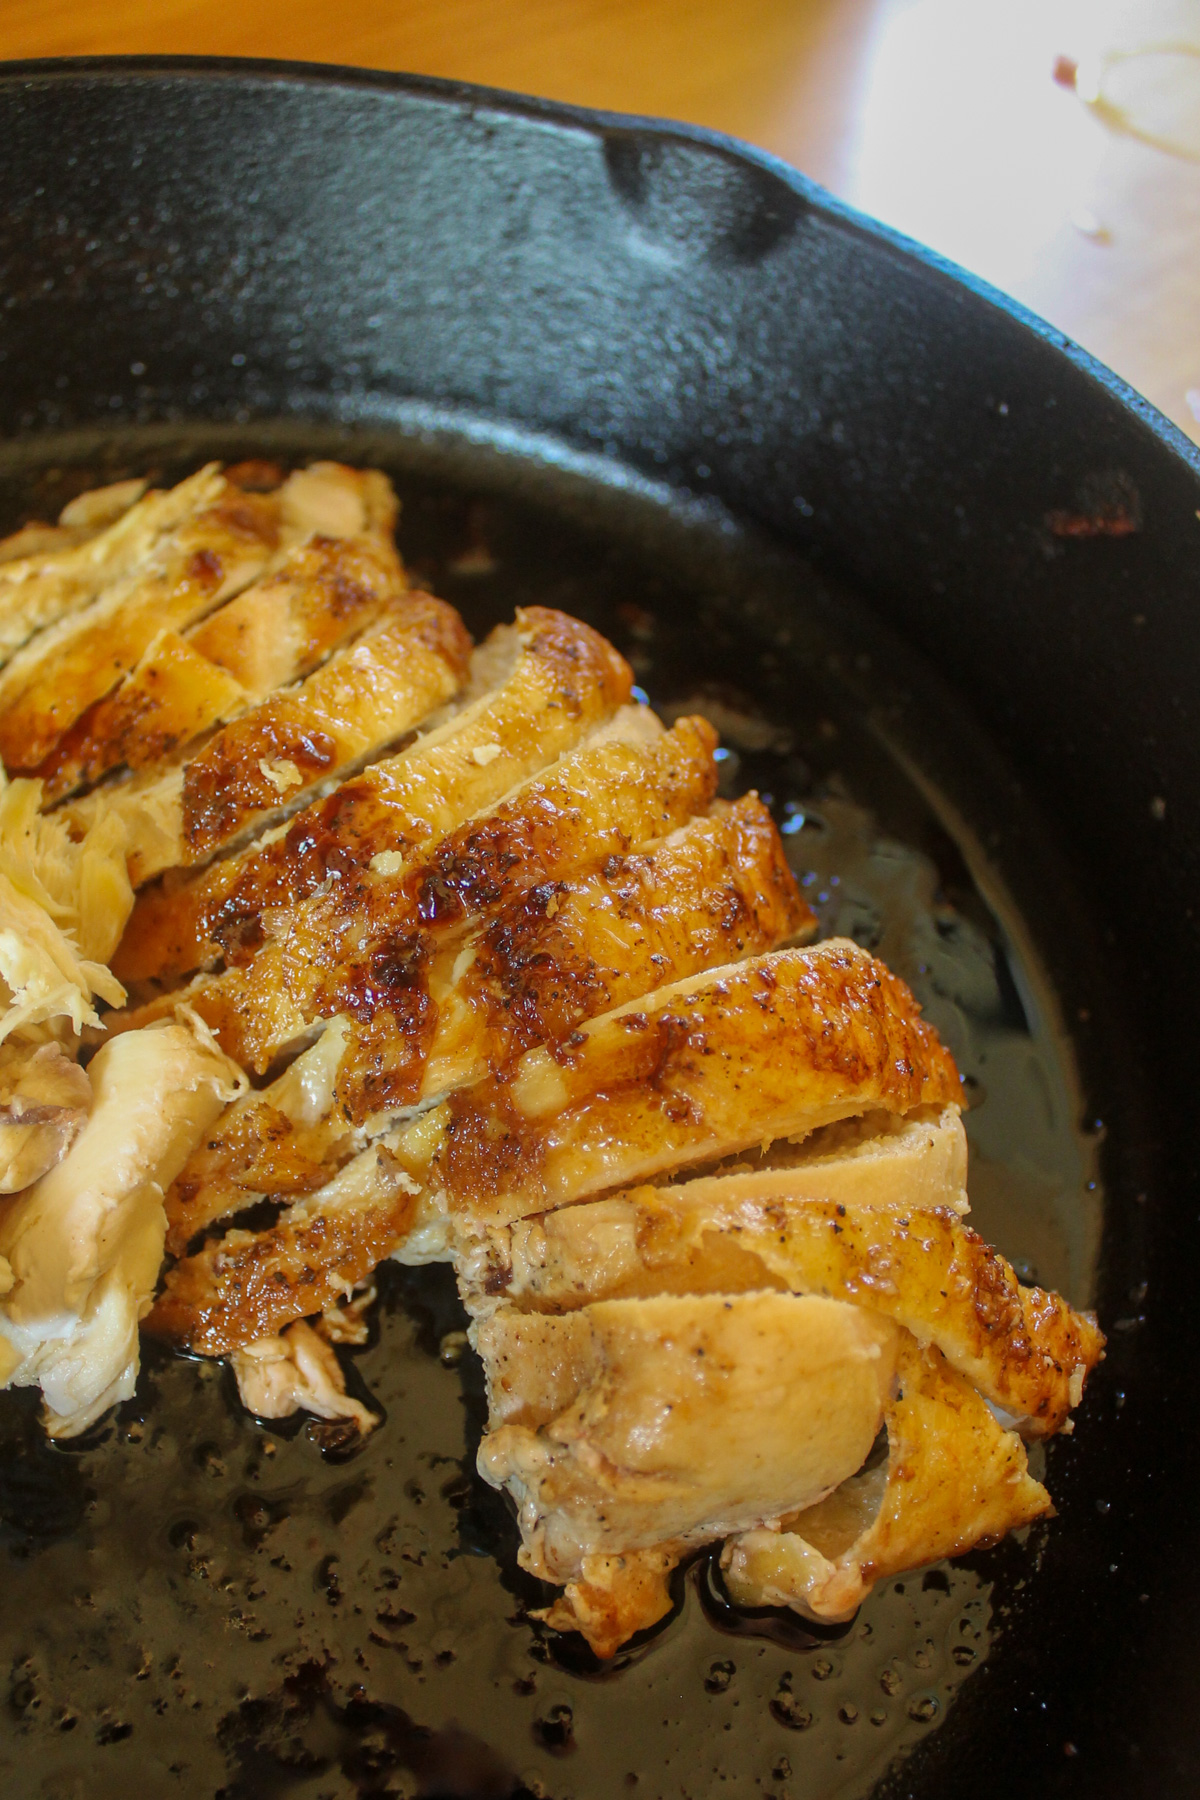
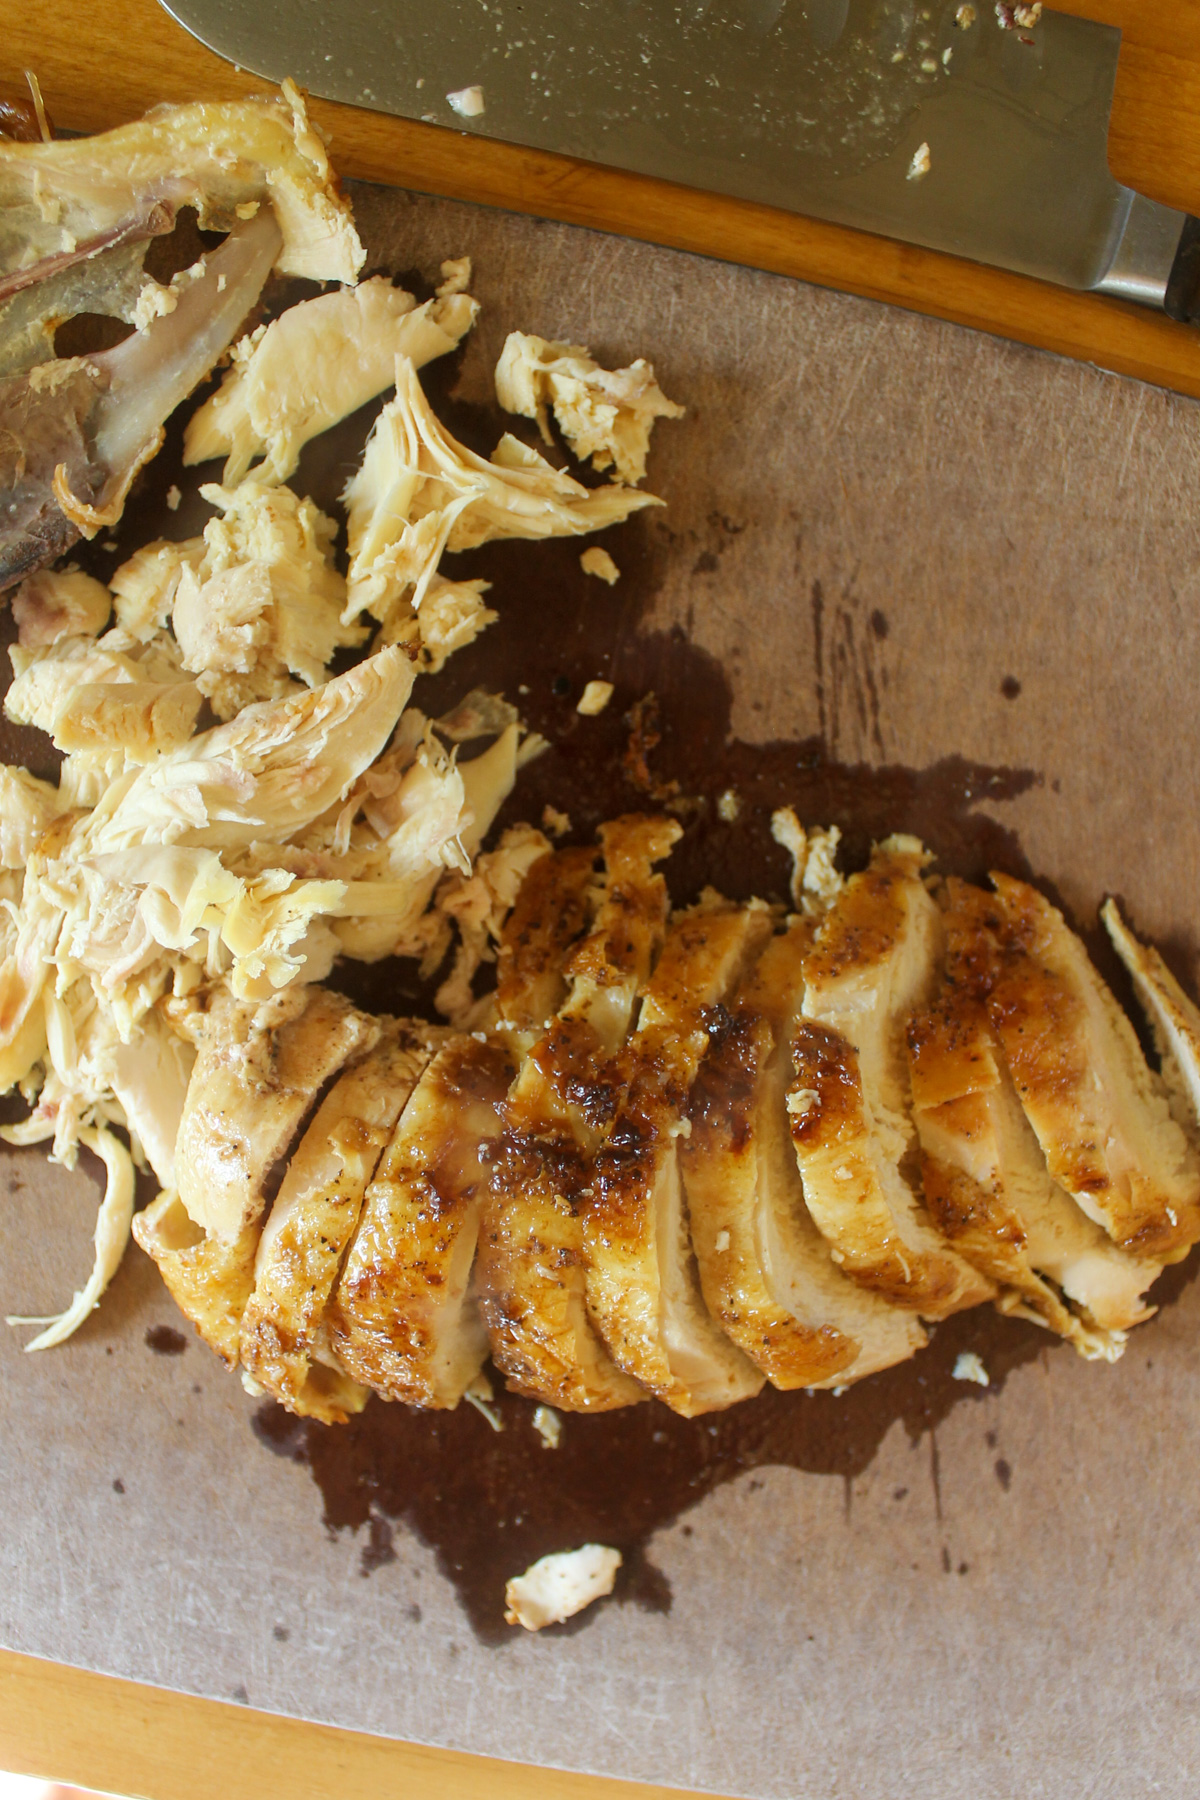
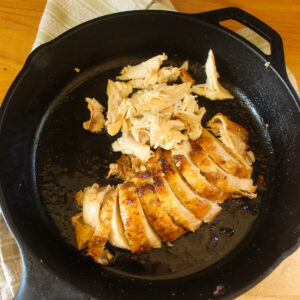
It can take anywhere from 20 to 40 minutes. The large chicken breast pictured took about 40 minutes.
The best way to determine when it's done is to check it with a thermometer. The internal temperature measured at the thickest part of the meat should be 165° F.
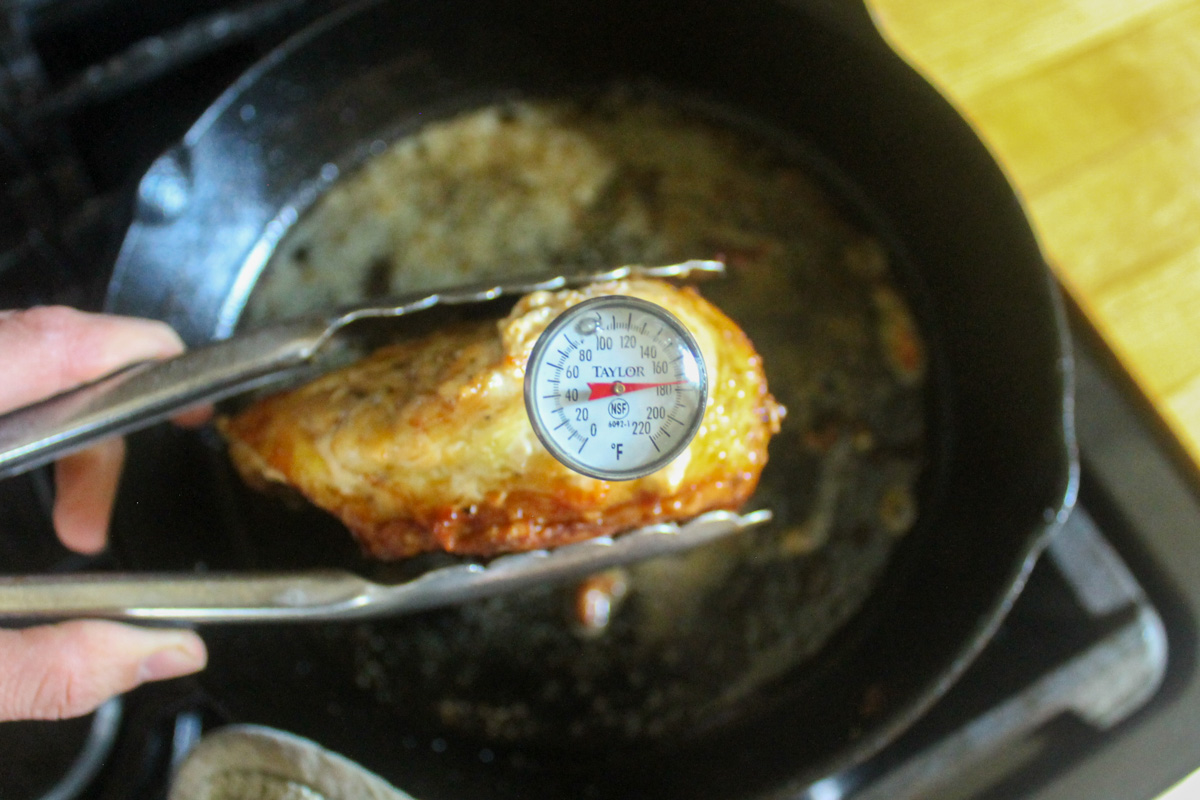
Step 5 - When it reaches 165°F, let your chicken rest in the skillet on the stovetop for 10 minutes before slicing.
This will allow the juices to cool slightly and redistribute, and not run out of the meat when you slice it.
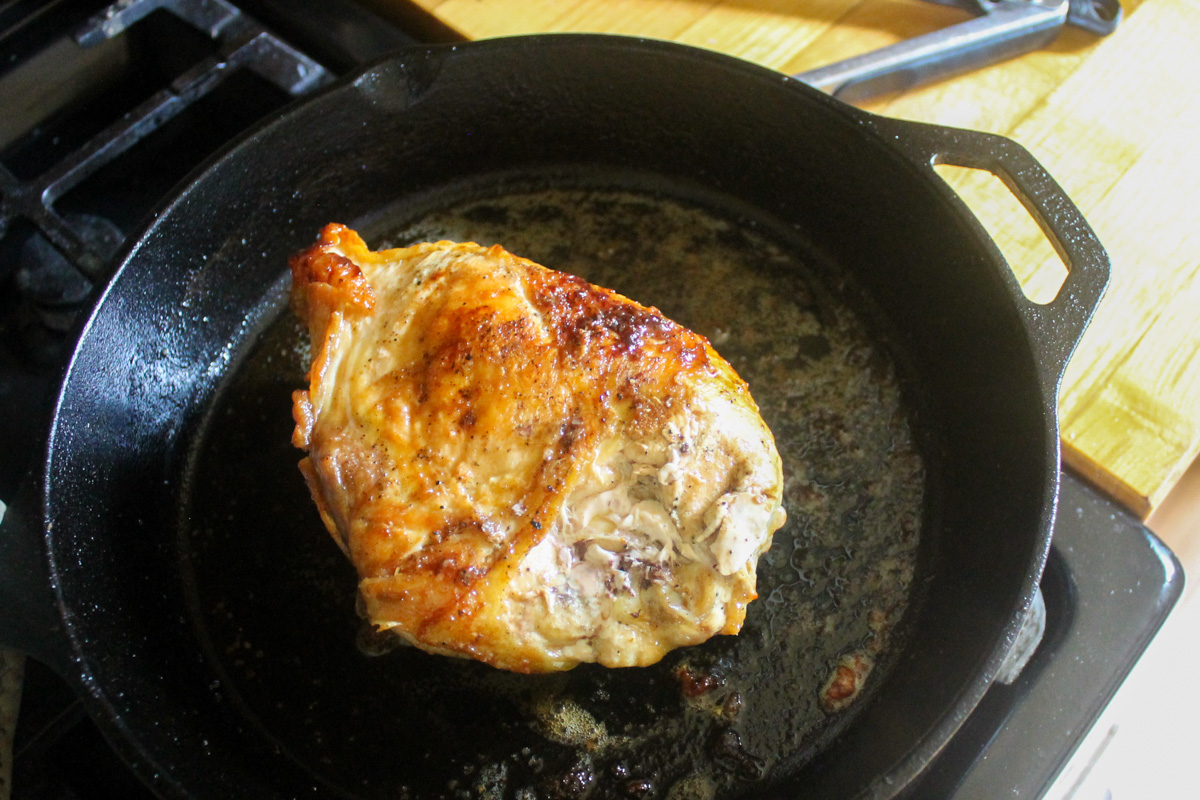
Step 6 - Slice your chicken off the bone, and then slice it, chop it, or shred it with your hands or 2 forks, depending on what you plan to use it for.
Make sure to pull all meat from the bone, some of it you won't be able to neatly slice. The bones can be frozen and saved to make Homemade Chicken Stock.
Tips for Perfect Skillet Chicken
- Use good quality, bone-in, skin-on chicken breasts for the best flavor. However, this recipe works for any cut of chicken. The same method can be used for cooking other meats too like pork tenderloin!
- Season generously with salt and pepper, but adjust for how much chicken you are cooking.
- Make sure your skillet is hot before adding your oil and then your chicken breast, skin side down.
- Oven time will vary depending on the thickness of your chicken. If you are cooking very thin pieces, check it after 10 minutes. For thicker pieces it can take as long as 40 minutes.
- Use a thermometer! Chicken should be cooked to an internal temperature of 165°.
- Use clean tongs! If using tongs to flip your raw chicken as you sear it, use a clean pair when taking the cooked, ready to eat chicken from the oven to slice.
- Let your chicken rest before slicing!
- Your handle will be HOT when you take your skillet out of the oven! Always keep a hot pad covering the handle so you don't forget it's still hot and grab it!
- Check out How to Clean a Cast Iron Skillet, it's different than cleaning a regular pan!

Ways to Use Cast Iron Skillet Chicken
Chicken breasts in a cast iron skillet can be sliced and eaten as a main course with Roasted Potatoes with Broccoli, or used in any recipe that calls for cooked chicken or rotisserie chicken.
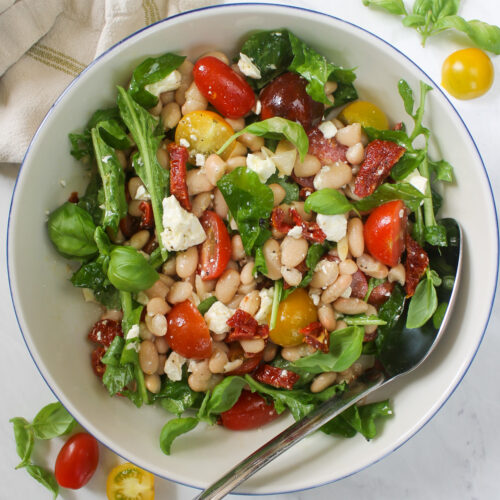
- Chicken Salad - Cooked and cooled chicken is perfect for Chicken Salad with Grapes and Apples, or Curry Chicken Salad, a delicious meal prep lunch!
- Soup - A larger cast iron chicken breast can often stretch into two meals, the leftovers being wonderful for soup! Try Chicken Wild Rice Soup or Chicken Tortilla Soup.
- Pasta - Lots of simple cream pastas use chicken! Try subbing it in this Creamy Farfalle with Peas or use it in this simple Pesto Alfredo Pasta.
- Casseroles - Add cooked chicken to your favorite casserole or for Chicken Veggie Pot Pie!
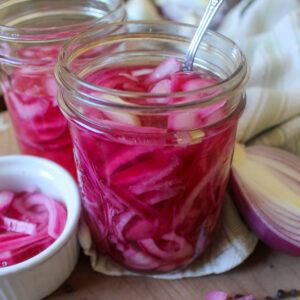
- Sandwiches - Add sliced chicken breast to buns with burger fixings like lettuce, tomato, onion and refrigerator pickles! Or use thinly sliced chicken in deli sandwiches or paninis with melty cheese.
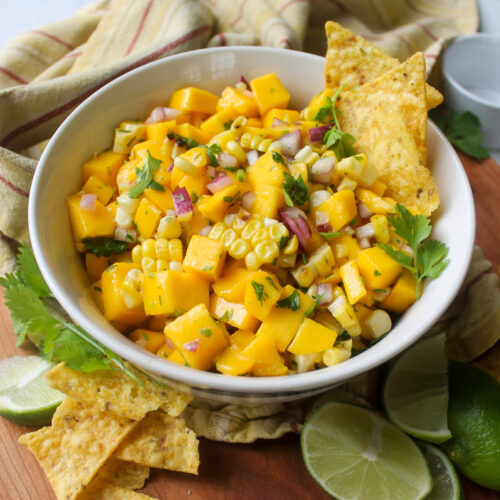
- Tacos - Cast iron chicken breasts are often transformed into taco night in our house! Before transferring the skillet to the oven, add sliced onion and bell pepper around the seared chicken and sprinkle everything with chili powder, cumin and garlic powder. The onions and peppers will cook as the chicken roasts. Slice and add to tortillas with all the taco fixings like Mango Corn Salsa! Cooked chicken is also great for sheet pan nachos or quick quesadillas in the panini press for lunch!
- Wraps - Deli wraps are an easy weeknight meal after cooking chicken in cast iron! To a large tortilla, add some lettuce and sliced chicken and add your favorite sauce. Try chicken Caesar, buffalo chicken, barbecue, or a southwest style with black beans and corn and a quick mix of 5 minute salsa and ranch! Avocado, cheese and tomato are great additions!
- Potstickers - Homemade Chicken Apple Potstickers are simply amazing! This large batch freezer meal prep recipe gives you an easy stir fry at home any time!
- Salad - Make a simple salad into a weeknight dinner by adding cast iron chicken sliced over the top! Try our Chopped Dinner Salad with Roasted Potatoes or this Grilled Peach and Burrata Salad with Chicken!
Equipment
A cast iron skillet is the best pan to use for this technique, although any oven safe skillet will work as well. Cast iron skillets are inexpensive, last a lifetime, and extremely versatile.
I use mine all the time for Ciabatta Steak Sandwich with Balsamic Onions, Shaved Pork Roast Sandwiches, and our favorite Cheesy Honey Skillet Cornbread.
I recommend the Lodge 10 inch cast iron skillet, it's the perfect size for basic every day use. It acts as an indoor grill pan for Skillet Burgers, usable on the stovetop and in the oven. If you love cast iron cooking, try this Italian Sausage Gnocchi with Spinach and Tomatoes!
Cleaning a cast iron skillet is easy, but different than cleaning a regular skillet. Read here on How To Clean A Cast Iron Skillet.
Recipe FAQs
Chicken should be cooked to an internal temperature of 165°F, measured with a thermometer. As your chicken nears the end of cooking, don't hesitate to take it out and check the temperature a few times to make sure you don't overcook it. Check the temperature in a few different places, especially near the bone and at the thickest part of the meat.
Cooked chicken can be stored in the fridge and used within 3 days. Cooked chopped chicken can be frozen, but the quality is not quite as good as when it's freshly cooked.
To avoid chicken sticking to the skillet, make sure to preheat the skillet and use oil. Most importantly, after you add the chicken to the hot pan, let it sear! That means don't try to move it around in the pan with tongs. Just leave it along for 4 or 5 minutes. When it sears and a nice crispy exterior forms, it will release itself from the skillet and you will know it's time to flip it!
No, it's best to thaw your chicken overnight in the refrigerator before searing and baking in a cast iron skillet. Make sure you thaw your chicken in some type of container so it doesn't drip in your fridge. If your chicken is mostly thawed but maybe still a little bit frozen, you can use this recipe but will need to bake the chicken in the oven longer. Use a thermometer to make sure the chicken is done (165°F).
Add flavored butter! Simply mix a tablespoon of room temperature butter with a clove of minced garlic, a tiny spoonful of honey, and a few fresh herbs such as parsley, basil, rosemary or thyme. Let the compound butter melt over the hot chicken as it rests. Serve with potatoes or vegetables, slice and enjoy!
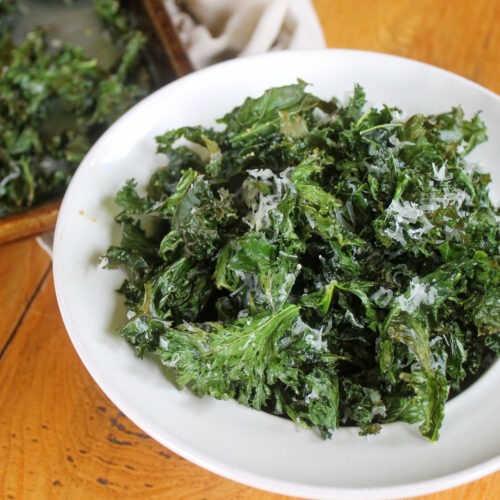
Easy Side Dishes to Serve with Chicken
If you made this recipe, I'd love to hear how you liked it! Be sure to leave a star rating by clicking the stars in the recipe card, or leave a comment below!
Follow Sungrown Kitchen on Pinterest, Instagram, and Facebook for loads of garden recipes! Be sure to Subscribe Here for new recipes delivered straight to your inbox!
Cast Iron Skillet Chicken Breast
Hit the stars to rate this recipe!
Print Pin RateEquipment
Ingredients
- 1 chicken breast skin-on, bone-in (1 large breast or 2 small)
- 1 Tablespoon olive oil
- ½ teaspoon kosher salt
- 10 grinds fresh black pepper
Instructions
- Preheat the oven to 400°. Preheat a cast iron skillet on the stovetop over medium high heat and add olive oil. Season the chicken on all sides with salt and pepper. Sear the chicken breast, skin side down, in the hot oil, about 4 to 5 minutes.
- Transfer the skillet to the oven to finish cooking through. This can take anywhere from 20 to 40 minutes depending on the thickness of your chicken breast.
- Use a thermometer to check your chicken in the thickest part of the breast, it should be 165°F when done.
- Let the chicken rest for 10 minutes before cutting off the bone and slicing. Make sure to pull all the chicken from the bone, some won't be able to be neatly sliced.
Notes
- Oven time will vary depending on the thickness of your chicken. If you are cooking very thin pieces, check it after 15 minutes. For thicker pieces it can take as long as 40 minutes. Any cut of chicken can be used with this method, breasts or thighs.
- This recipe can be made with any amount of chicken that will fit in an even layer in a cast iron skillet. You can also use boneless skinless chicken breast or chicken thighs.
- If using tongs to flip your raw chicken as you sear it, use a clean pair when taking the cooked, ready to eat chicken from the oven to slice to avoid cross-contamination.
- Find out How to Clean a Cast Iron Skillet!
Nutrition
Food Safety
- Cook chicken to a minimum temperature of 165 °F (74 °C)
- Do not use the same utensils on cooked food, that previously touched raw meat. For example, a clean pair of tongs should be used to take the cooked chicken from the oven, don't use the same ones that flipped the raw chicken.
- Wash hands after touching raw meat
- Don't leave food sitting out at room temperature for extended periods
- Never leave cooking food unattended
- Always have good ventilation when using a gas stove
John says
Excellent and easy. A great way to use chicken as a staple ingredient.