
This post contains affiliate links.
A beautiful fruit platter is one of those things that looks like it took real effort, but once you know the five-step method, it comes together in about 15 minutes and never fails to impress!
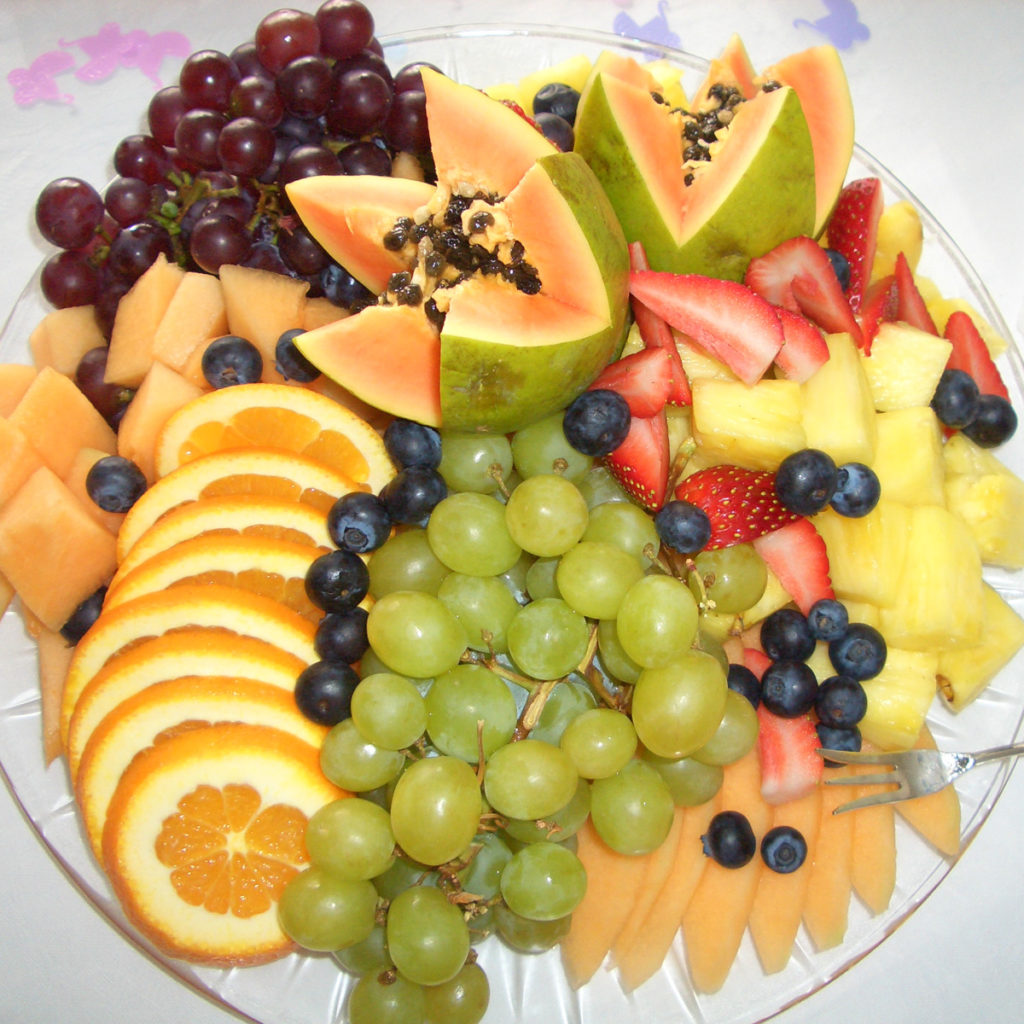
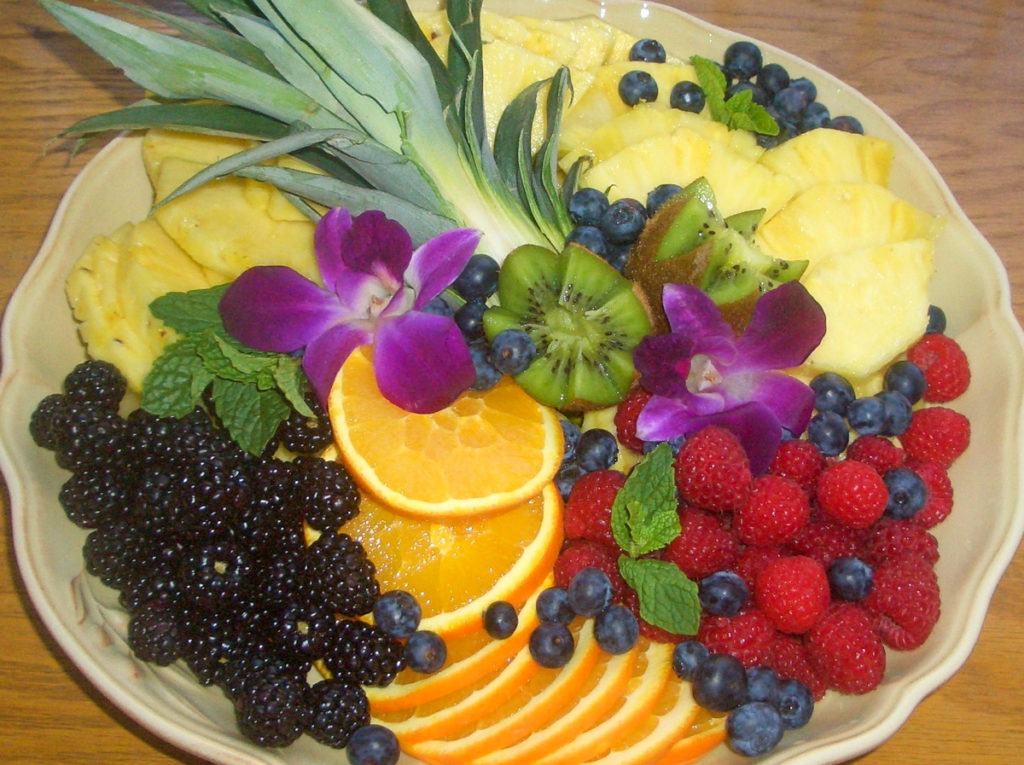
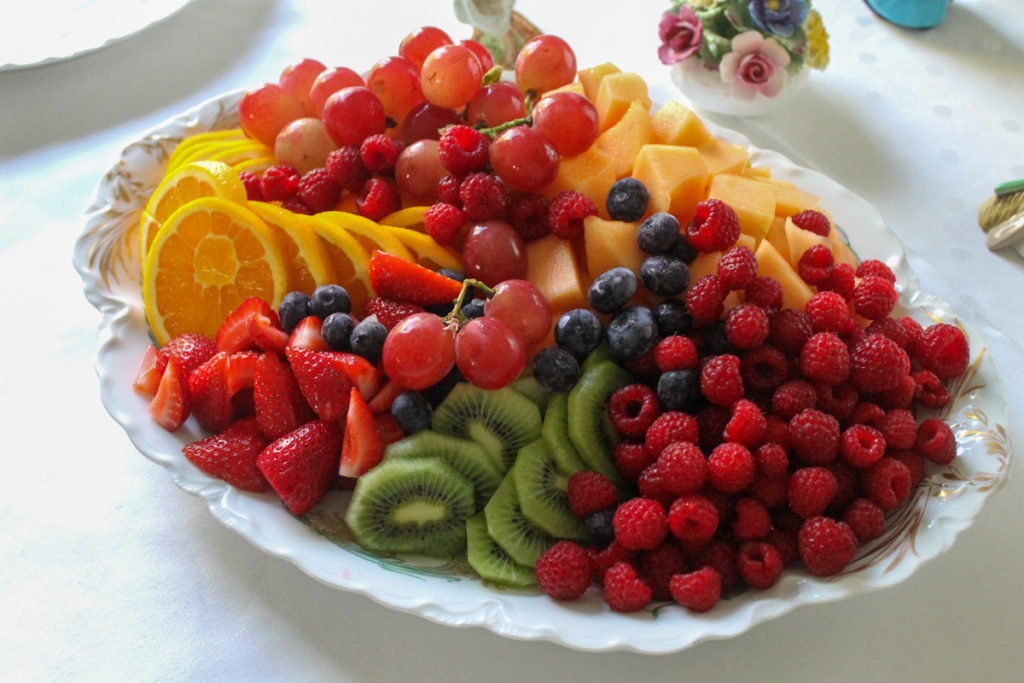
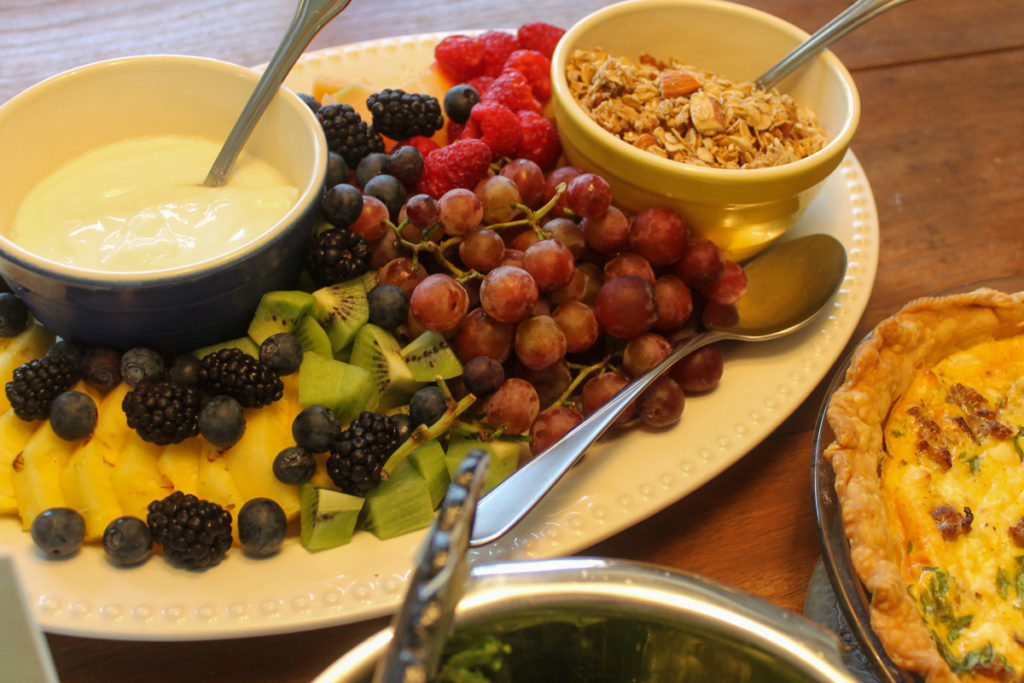
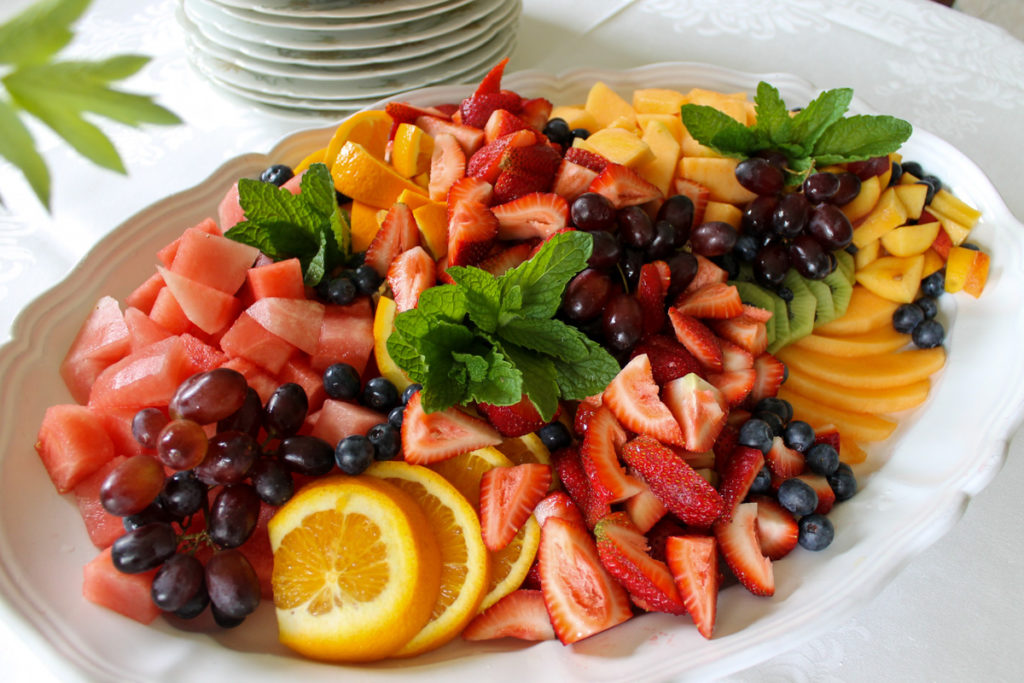
Fruit Platter Presentation
- Gorgeous Presentation - In culinary school, how your dish looked was considered just as important as how it tasted. Presentation mattered on every plate. I've carried that lesson into home cooking ever since, and a fruit platter is one of the easiest places to put it into practice. Anyone can chop fruit and pile it in a bowl. But arrange it with a little intention, curves, height, color contrast, and your guests will be saying "who made the fruit tray?!" before they've even tasted it.
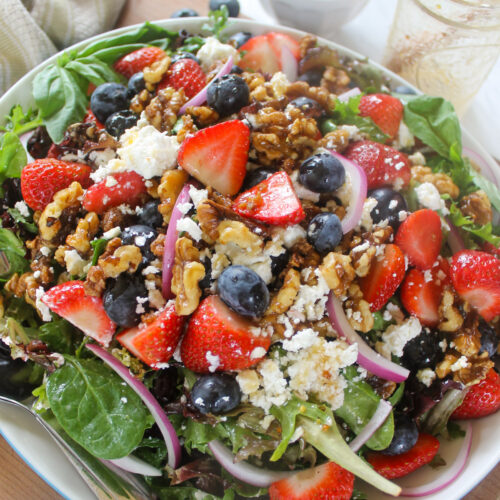
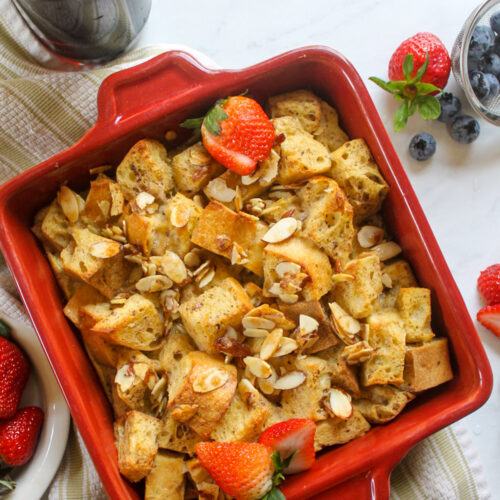
- Perfect for Brunch - I make some version of this fruit platter at almost every brunch I host, from casual Sunday mornings to baby showers and Easter gatherings. It pairs beautifully with Sausage and Spinach Quiche, Bacon Egg & Cheese Biscuit Sandwiches, or French Toast Bake. Add a Strawberry Goat Cheese Salad, and a basket of Almond Cherry Scones.
- Follow the five steps below, they work every single time, with whatever fruit is in season!
Jump to:
- WANT TO SAVE THIS RECIPE?
- Fruit Platter Presentation
- Ingredients - What Fruit to Use
- Step-by-Step Instructions
- Make-Ahead Tips - Can You Make a Fruit Platter the Day Before?
- Fruit Platter Ideas by Season and Occasion
- More Helpful Tips
- Recipe FAQs
- Brunch Menu Favorites to Add A Fruit Platter!
- How to Make a Beautiful Fruit Platter
Ingredients - What Fruit to Use
Any fresh fruit works here. The key is a variety of different colors, shapes, and sizes to make a platter look abundant and beautiful. Most fruits fall into one of the five categories in the instructions below.
However, they are easy to adjust larger or smaller, or make multiple if serving a large group. Make sure all your ingredients are washed and ready to eat.
Filler Fruit (your base)
- Cantaloupe or Honeydew - Peeled, seeds removed with a portion scoop or spoon and cut into cubes
- Pineapple - peeled, core removed and cut into chunks
- Watermelon - cubes or wedges with the rind for holding (Cut the day of, they release a lot of juice if done in advance)
Curves (sliced for visual lines)
- Navel oranges or clementines - cut into round slices or wedges
- Kiwi - peeled and sliced into rounds
- Peach, plums, or nectarine slices - seasonal for summer
Height
- Red or green grapes - use a scissors to cut into small clusters
- Cherries - washed with stems, piled generously
- Pineapple top halved lengthwise - doubles as a garnish
Berries (color and finishing)
- Strawberries - whole with stems, or halved
- Blueberries
- Blackberries
- Raspberries
Garnish (optional, but pretty!)
- Fresh mint leaves
- Pomegranate seeds
- Edible flowers
- Zig-zag cut kiwi or small papaya
- Squeeze of fresh lemon juice (keeps fruit bright and fresh longer)
Avoid bananas, apples, and pears on a pre-assembled platter. They brown too quickly. If you want to include them, slice and add just before serving.
Step-by-Step Instructions
Step 1 - Start with a "Filler Fruit"
Take a look at each photo. Every fruit plater starts with a base to build on. Pile your chopped pineapple, cantaloupe, or honeydew at the bottom of the platter as the foundation.
You could also use watermelon cubes or wedges if it's in season, but be careful if making your fruit tray too far in advance as your watermelon can get your platter pretty watery.
If you're adding small bowls of yogurt and Homemade Granola like in the photo below, place the empty bowls on the platter before any fruit. You can fill them later.
Step 2 - Make Something Curve
This is the step that makes a fruit platter look arranged rather than dumped. Around your filler fruit, you want to form some curving lines.
I like using orange rounds or kiwi slices. Lay them slightly overlapping in a gentle S-curve or arc. You could also use peach or plum wedge slices and form them into a curve.
Step 3 - Something for Height
Bunches of grapes are my favorite option to add height. Before piling them up, cut them into bunches with a scissors in amounts for one person. Piles of cherries are also great for height.
They stay put, they look generous, and they provide that dark purple-green contrast that makes the other colors pop. The top of a pineapple sliced in half is a decorative option too.
Step 4 - Finish with Berries
Berries are the finishing touch that brings a platter together. Tuck piles of blueberries, blackberries, and raspberries into any gaps. Run them along a curve or just sprinkle them here and there.
Strawberries can be left whole with the stems, or sliced in half or quartered.
Step 5 - Garnish
This step is optional, but it's what takes a good platter to a great one. A few sprigs of fresh mint tucked in between fruit adds green color and a lovely fresh scent. Pomegranate seeds scattered across the top look like tiny jewels. Edible flowers are stunning for a special occasion.
A kiwi or small papaya cut around in a zig zag and pulled apart also looks nice. A little squeeze of lemon juice can also keep your fruit fresh longer and adds a little flavor enhancement.
Make-Ahead Tips - Can You Make a Fruit Platter the Day Before?
What you can do 1-2 days ahead: Cut your melon (cantaloupe, honeydew, pineapple) and store it in airtight containers in the refrigerator. These fruits hold up well pre-cut and are the most time-consuming to prep, so doing this early saves the most effort.
What to do the morning of: Wash and dry berries. Cut grapes into clusters. Prepare kiwi and orange slices. You can assemble the full platter at this time, or keep ingredients in the fridge to assemble closer to serving.
What to do just before serving: Assemble the platter. Add any cut apples, pears, or bananas. Squeeze lemon juice over the finished tray, cover with plastic wrap, and refrigerate or transport to the party.
How far ahead can you fully assemble? A fully assembled platter (without browning fruits) can be covered and refrigerated for up to 3-4 hours before serving. Don't go much earlier that that or the berries can start to look limp.
Fruit Platter Ideas by Season and Occasion
Spring (Easter, Mother's Day, Baby Shower) Strawberries, kiwi, green grapes, honeydew, and orange slices give you the soft, pastel colors that feel naturally festive this time of year. Tuck in a few edible flowers or mint for a baby shower or Mother's Day brunch that looks truly special.
Summer (BBQs, Graduation Parties, 4th of July) Summer is the most abundant season for a fruit tray. Watermelon, fresh peaches, sweet cherries, strawberries, blueberries, and raspberries are all at their peak.
Fall (Thanksgiving, Halloween) Trade the berries for grapes, figs, pomegranate arils, and sliced pears alongside orange rounds and honeycrisp apple slices. Add apple and pear slices at the last minute since they brown quickly.
Winter (Christmas, New Year's) Citrus is the star of winter platters. Navel oranges, blood oranges, clementines, and grapefruit rounds arranged with pomegranate arils, kiwi, and red and green grapes make a stunning holiday tray. A sprig of rosemary or mint as garnish adds a festive touch.
More Helpful Tips
- Storage and Leftover Fruit - Leftover fruit can be stored in the fridge and eaten within a day or two, or frozen and added to your Smoothie Bucket for easy weekday smoothies.
- How much Fruit Per Person? A general rule is about ¾ to 1 cup of cut fruit per person. The fruit platters pictured all serve about 6 to 8 people. For 12 to 15 people, make two or use a larger platter. Use 3 platters for 20 or more people.
- Use Lots of Color - Make your piles and curves in contrasting colors. Put green kiwi next to orange melon, red berries next to oranges. Mix it up as much as you can!
- Kid-Friendly Cut Fruit Platter - If making a fruit tray especially for kids, I like to go heavy on the easy-to-eat foods they love! Watermelon wedges with the rind on for easy holding, little cutie oranges that they can grab and go, and lots of yummy grapes and berries! This makes a great addition to a birthday party and adds a little nutrition to balance the cake and ice cream!

Recipe FAQs
To cut a kiwi, first cut off each end with a sharp pairing knife. Then stand it on end and use the knife to cut the peel off in small arcs. From top to bottom, try to cut just inside the peel to remove as little of the green flesh as possible. Cut off any small parts of the peel you may have missed. When your kiwi is peeled, either cut it in round sliced or chopped pieces. To make a zig zag kiwi garnish, keep the peel on the fruit. Using a sharp pairing knife make a zig zag cut pattern around the outside equator and inserting your knife just into the center. When you are all the way around, gently pull it open to display the green inside.
Using a serrated bread knife, cut off each end of the melon. Then stand it on end and use the serrated knife to cut the peel off. Use an arc motion from top to bottom, try to cut just inside the peel to remove as little of the orange flesh as possible. Check and remove any bits of peel you may have missed. Slice through the middle of the cantaloupe from top to bottom and scoop out the seeds. A portion scoop or ice cream scoop works well, or use a regular spoon. Lay the two halves on your cutting board cut side down. Make cuts diagonally in a grid pattern, one direction and then the other. Making them diagonal helps to keep your melon from collapsing into the empty seed cavity while you are trying to cut it.
Using a serrated bread knife, cut off each end of the pineapple. Stand it on end, and use the serrated knife to cut off the peel. Use an arc motion from top to bottom, try to cut just inside the peel to remove as little of the yellow flesh as possible. Check and remove any bits of peel you may have missed. Stand the pineapple on end and cut down through the center to form two halves. Then cut each piece in half again from end to end so you now have 4 long pieces. Lay the pieces on a cutting board so the right angle faces to the right. Next cut the core out of each piece. Where your right angle is, use your knife to cut a triangular strip from end to end to get rid of the core. Do this on each of the 4 pieces. Now cut each piece in half lengthwise and then dice it crosswise into bite sized pieces.
Brunch Menu Favorites to Add A Fruit Platter!

If you made this recipe, I'd love to hear how you liked it! Be sure to leave a star rating by clicking the stars in the recipe card, or leave a comment below!
Follow Sungrown Kitchen on Pinterest, Instagram, and Facebook for loads of garden recipes! Be sure to Subscribe Here for new recipes delivered straight to your inbox!

How to Make a Beautiful Fruit Platter
Hit the stars to rate this recipe!
Print Pin RateIngredients
- 2 cups melon or pineapple chopped
- 1 orange or kiwi sliced
- 2 cups grapes or cherries
- 1 to 2 cups berries or pomegranate seeds
Instructions
- Start with a Filler Fruit - Make a pile or two toward the back of your platter with a filler fruit such as cantaloupe, honeydew melon, watermelon, or pineapple. This gives you a base to add to. If adding bowls of yogurt and Homemade Granola to the platter, set the bowls out first (you can fill them later).
- Make Something Curve - Around your filler fruit, add sliced oranges or kiwi in a curve shape.
- Something for Height - Add large piles of grapes or cherries for some height. Grapes can be left on the stem but cut into bunches with a scissors in amounts for 1 person.
- Finish with Berries - Make piles of berries here and there, the more colorful the better! You can also make lines of berries along your curves and in between the piles of different fruits.
- Garnish - Not really necessary but kinda fun! Mint leaves, pomegranate seeds, and edible flowers are great! A kiwi or a small papaya cut around in a zig zag pattern and pulled apart also looks nice. Leaving your strawberries whole with the stems gives you a pop of green color.
Notes
- Storage - It is best to prepare a fruit tray the day you are going to serve it, cover it with plastic wrap and store it in the fridge. Leftover fruit can be stored in the fridge and eaten in the next day or two, or frozen and added to a Smoothie Bucket
- Avoid bananas, apples and pears as they brown quickly, unless you want to add them just before serving.


Leave a Review